User Guide
Using AnyMarker
AnyMarker connects to OBS Studio over its built-in WebSocket server and lets you tap custom chapter markers while you record - then bakes them into your MP4, M4V, or MOV as real chapters the moment OBS finishes writing the file. This guide covers setup, recording with markers, presets, embedding, and troubleshooting.
01 · Get Started
Overview
OBS's own chapter markers give you one generic marker type. AnyMarker replaces that with as many named markers as you want - 📸 Highlight, 💀 Death, 🎙️ Sponsor Read - organized into presets you can switch per game, show, or project.
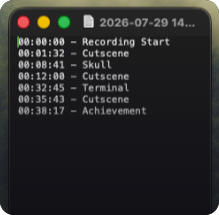
AnyMarker runs as a small companion window (the dock) alongside OBS. While you record, tap a marker button and AnyMarker writes a timestamp into a plain .txt file next to your video. When the recording stops, AnyMarker turns that file into real chapter metadata inside the video itself, so anyone scrubbing the finished file - YouTube, VLC, a video editor - can jump straight to the moment.
Get Started
Screenshots
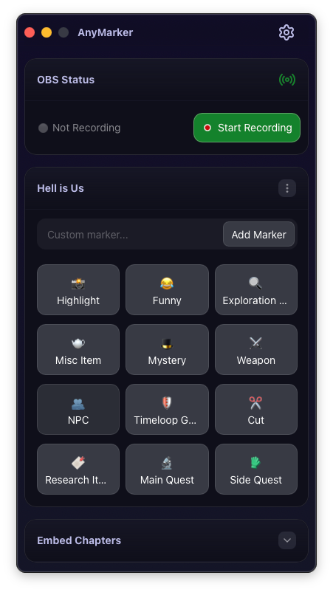
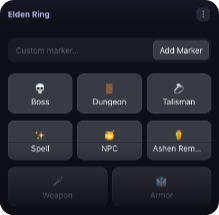
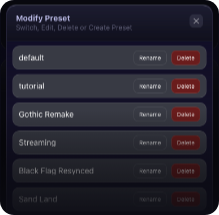
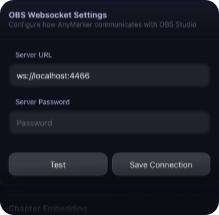
Captured from the running app, not mockups.
Get Started
Requirements
- OBS Studio 28.0 or later, with its built-in WebSocket server turned on -
Tools → WebSocket Server Settings → Enable WebSocket server. - macOS (Apple Silicon) or Windows 10/11 (x64).
- Nothing to install inside OBS - no Lua script, no Browser Dock. AnyMarker bundles its chapter tools, so you don't need to install anything else either.
AnyMarker only talks to OBS over a local connection on your machine. Recording, marking, embedding, and licensing all work with no internet connection - you only need one to check for app updates.
Get Started
Setup Wizard
The first time you open AnyMarker, a three-step wizard walks you through connecting OBS, choosing how chapters get embedded, and starting your trial or activating a key.
Connect to OBS Studio
In OBS, open Tools → WebSocket Server Settings → Show Connect Info and copy the Server URL and Password shown there.
Paste them into the wizard - Server URL defaults to ws://localhost:4455, and Password is optional if you haven't set one in OBS.
Chapter Embed Setup
Leave the engine on Automatic - AnyMarker picks the right tool for each file. Both are bundled; no extra install.
Keep .txt chapter files after embedding is on by default, so the plain-text marker file next to your video sticks around even after chapters are baked in.
You're All Set
Start your 7-day free trial - no card required - or enter a license key (XXXX-XXXX-XXXX-XXXX) and hit Activate.
Finish stays disabled until you're either trialing or licensed.
Need to change your OBS connection or embed settings later? That's the Settings page. To re-run the wizard itself, open the File menu and choose Run Setup Wizard.
02 · Using AnyMarker
The Dock
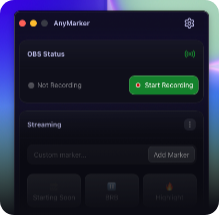
The dock is the small window you keep open while you record. It has four cards, top to bottom.
🔌OBS Status
Shows the live connection state to OBS. If AnyMarker gives up retrying after a dropped connection, a Reconnect button appears in the header so you can retry by hand.
⏺️Recording
Reads Not Recording when idle. Start Recording starts (and stops) the OBS recording, and the timer counts elapsed time while it runs.
🏷️Chapter Markers
Tap a preset button while recording to drop a marker at that timestamp, or type into Custom marker… and press Add Marker for a one-off label.
✨Embed Chapters
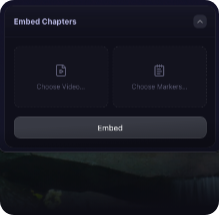
Collapsed by default. Expand it to manually embed chapters into any video - see Embedding Chapters below.
The Chapter Markers card's menu also opens three tools: Edit Markers, Switch Preset, and Modify Preset - covered next.
Using AnyMarker
Marker Presets
A preset is a named set of marker buttons. Keep one for each game, show, or project and switch between them in a click.
Edit Markers
Opens the button list for your current preset. Drag a row by its grip handle to reorder it, click Add Marker to append a new one, and edit any button inline with an emoji picker plus a text field. Nothing saves until you hit Save.
Modify Preset
Lists all your presets. Click any row to switch to it - that saves and closes automatically. Each row also has Rename and Delete (built-in presets can't be deleted). Create New Preset adds a new preset seeded with two default buttons, 📸 Highlight and 😂 Funny, and drops you straight into renaming it.
Every action in Modify Preset saves right away - there's no separate Save step like in Edit Markers.
Using AnyMarker
Embedding Chapters
Markers you tap during recording live in a plain .txt timestamp file next to your video. Embedding is the step that turns that file into chapter metadata baked directly into the video.
Auto-embed
When Auto Embedding is on (in Settings), AnyMarker waits a few seconds after OBS reports the recording has stopped - giving OBS time to finish writing the file - then embeds automatically. AnyMarker only deletes the .txt sidecar afterward if you set Keep .txt File After Embed to Delete; the default is to keep it.
Manual embed
Expand the dock's Embed Chapters card, use Choose Video… and Choose Markers… to pick any video and its matching .txt file - it doesn't have to be from your current session - then click Embed. Manual embed never deletes the .txt file.
Choosing an engine
Chapters are written directly into your file's metadata - the video itself is never rewritten, so embedding finishes in well under a second whether the recording is 100 MB or 20 GB, and it needs no extra disk space. Automatic uses mp4chaps where possible, which adds chapters that QuickTime Player, VLC, Plex and Infuse can all read; it falls back to MP4Box for unusual files. Leave it on Automatic unless you have a specific reason not to.
MKV is not supported - the format can't carry these chapters. Record in Hybrid MP4 (OBS 30.2+), which is crash-safe and works with chapters.
03 · Configure
Settings
Open Settings from the dock's menu. It's split into three groups.
| Section | Controls |
|---|---|
| OBS Websocket Settings | Server URL, Server Password, Test the connection, Save Connection. |
| Chapter Embedding | Auto Embedding (Enable/Disable), Keep .txt File After Embed (Keep/Delete), Engine (Automatic, mp4chaps, or MP4Box), Save Embed Settings. |
| Display Language | Changes AnyMarker's UI language. |
| About | Links to the AnyMarker website and a Report a Problem link. |
Settings requires an active trial or license to open - if yours has lapsed, save your connection details after reactivating.
Configure
License & Trial
AnyMarker is a one-time $14.99 purchase after a 7-day free trial - no subscription, no card required to start the trial.
- One trial per machine. This is a soft check meant to discourage casual resets, not a strict security boundary.
- A license key isn't locked to one computer, but you move it to a new one from your Polar account (the customer portal you get after purchase).
- Moving a key off an old machine never resets a trial you already used there.
- If your trial lapses with no license active, AnyMarker shows a lock screen with Activate and Buy - no trial button there, since a trial can only be started once, from the wizard.
04 · Help
Troubleshooting
Tools → WebSocket Server Settings → Show Connect Info..txt marker file instead.Help
Files & Logs
AnyMarker keeps your connection settings separate from your marker presets, so resetting one never wipes the other.
| File | Contents |
|---|---|
~/.anymarker_config.json | OBS connection, embed preferences, license state. |
~/.anymarker_preset.json | Your marker presets and buttons. |
Log files
~/Library/Logs/AnyMarker/app.log%LOCALAPPDATA%\AnyMarker\logs\app.logOnce app.log passes 2 MB, AnyMarker rotates it: the current file becomes app.log.1, the old app.log.1 becomes app.log.2, and AnyMarker drops whatever was in app.log.2. That caps total log storage at roughly 6 MB.
On macOS, crash reports (if AnyMarker ever quits unexpectedly) land in ~/Library/Logs/DiagnosticReports/anymarker-*.ips - worth attaching alongside app.log when reporting a problem.